How to Check and Inflate Your Tire Pressure at Home
Tires are the only part of your car that actually touch the road, so keeping them in good condition is absolutely essential for your safety, fuel efficiency, and overall performance. Honestly, one of the easiest and most overlooked ways to maintain your tires is by simply checking the tire pressure and inflating them correctly. To do this accurately, you will need a reliable tire pressure gauge. The good news? You don’t need any special tools or previous experience to get this job done right. In fact, a basic tire pressure gauge is affordable and available at any auto parts store.
In this guide, we will walk you through the entire process step by step. Consequently, by the time you finish reading, you will feel confident enough to handle it yourself without any hesitation. We will also explain how to use a tire pressure gauge properly, because let’s be honest, using one incorrectly can give you false readings and lead to bigger problems down the road.
Why Tire Pressure Matters More Than You Think
First and foremost, proper tire pressure is not just about comfort; it directly affects how your car behaves on the road. When your tires are inflated to the correct level, you benefit in several important ways.
For starters, you get safer handling and shorter braking distances. Additionally, your fuel efficiency improves noticeably because underinflated tires create more rolling resistance. On top of that, even tire wear becomes possible, which means your tires last much longer. Most importantly, maintaining the right pressure significantly reduces the risk of dangerous blowouts.
Let’s be clear about what happens when things go wrong. Underinflated tires tend to overheat, especially on long drives, and they wear out faster on the edges. Overinflated tires, on the other hand, have less contact with the road, which reduces traction and makes the ride uncomfortably harsh. Therefore, finding that sweet spot is crucial.
Tools You Will Need
Before you get started, gather these simple items. Fortunately, most of them are probably already lying around your house or garage.
A tire pressure gauge, which can be either digital or analog
An air compressor or a simple hand pump
Your vehicle owner’s manual, where the recommended pressure is listed
A piece of chalk or a marker, which is optional but helpful for marking tires that need extra attention
Step 1: Find the Recommended Tire Pressure
To begin with, you need to know the correct pressure for your specific vehicle. Do not guess this number, and here is a common mistake to avoid: never use the maximum pressure printed on the tire sidewall. That number is for the tire itself, not for driving.
Instead, check the sticker located on the driver’s side door jamb. Alternatively, you can look in your owner’s manual. These sources will list the recommended pressure for both front and rear tires, usually measured in PSI, which stands for pounds per square inch.
Step 2: Check Tire Pressure When Tires Are Cold
Timing is everything when it comes to accurate readings. Ideally, you should check your tire pressure in the morning before you drive anywhere. If that is not possible, wait at least three hours after the car has been parked.
Why does this matter? Well, driving heats up the tires, and heat causes the air inside to expand. Consequently, a warm tire will show a higher pressure reading than what is actually accurate. Checking when the tires are cold ensures you get the real picture.
Step 3: Remove the Valve Cap
Now, move to the first tire and unscrew the small valve cap from the air valve. It is a tiny piece, so put it somewhere safe like your pocket or the cupholder. You will need to put it back on later, and trust me, losing these little caps is surprisingly easy.
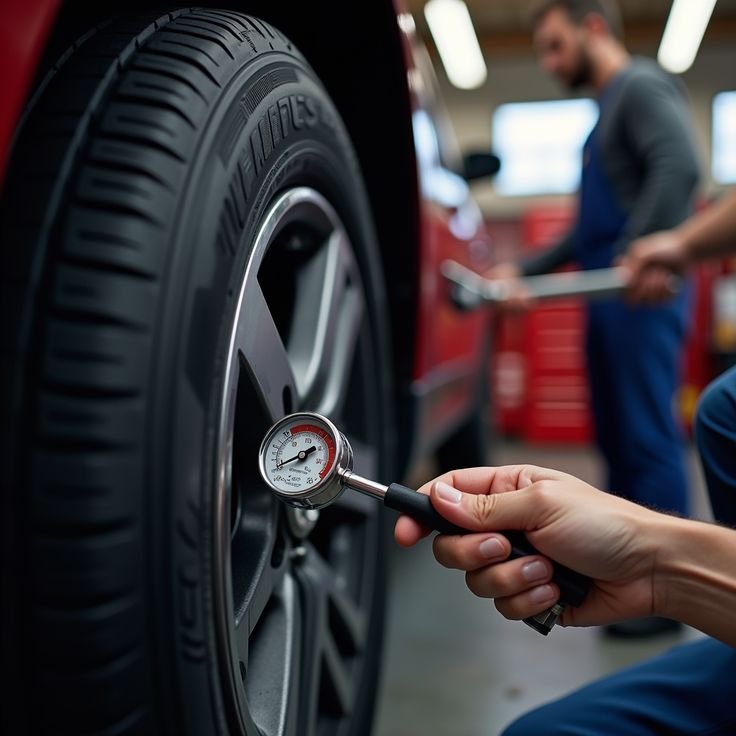
Step 4: Measure the Pressure
Take your tire pressure gauge and press it firmly onto the valve stem. You might hear a brief hiss of air, which is normal, but make sure the gauge is pressed straight and tight to get a proper seal. Once it is in place, read the measurement on the gauge.
After noting the reading, compare it to the recommended PSI you found earlier. Repeat this process for all four tires, and do not forget to check the spare tire as well if your car has one. It is better to know now than to discover a flat spare in an emergency.
Step 5: Inflate or Deflate as Needed
Depending on what your gauge tells you, you will either need to add air or let some out. Here is how to handle both situations.
If you need to inflate:
Connect the air compressor or pump to the valve stem. Add air in short bursts rather than all at once. After each burst, check the pressure again with your gauge. Keep doing this until you hit the recommended number.
If you need to deflate:
This happens when the pressure is too high. Simply press the small pin inside the valve stem with the back of your gauge or a tiny tool. You will hear air escaping. Release it slowly and check the pressure frequently until it drops to the correct level.
A word of caution here: do not overinflate intentionally thinking it gives better performance. An overinflated tire actually reduces the contact patch with the road, which makes the ride harsh and decreases grip.
Step 6: Replace the Valve Caps
Once every tire is at the correct pressure, screw the valve caps back on securely. These caps are not just decorative; they keep dirt, dust, and moisture out of the valve mechanism. Without them, you could end up with a slow leak over time.
Step 7: Make It a Regular Habit
Finally, checking tire pressure should not be a one-time thing. Get into the habit of inspecting your tires at least once a month. Additionally, make it a point to check before any long road trip or whenever you are carrying a heavy load.
Regular attention like this pays off in the long run. You will notice smoother handling, better fuel economy, and fewer surprises on the road.
Safety Tips to Keep in Mind
Before we wrap up, let us go over some essential safety points.
Always check the pressure when the tires are cold for the most accurate reading.
Never drive on underinflated or overinflated tires, as both conditions compromise safety.
Keep a portable tire pressure gauge inside your glove compartment so you always have it handy.
While you are down there checking pressure, take a moment to inspect each tire for cuts, bulges, or uneven wear patterns. Catching these early can prevent bigger problems later.
Final Thoughts
In conclusion, checking and inflating your tire pressure is one of those simple tasks that makes a huge difference. It does not require a mechanic, it takes only a few minutes, and the benefits are enormous. Regular pressure checks improve your safety, extend the life of your tires, and even save you money at the pump.
At CarFixedExpert.com, our goal is to make car maintenance approachable for everyone. By following these straightforward steps, you can ensure that your tires are always in good shape and that your car handles safely on every single trip you take.

Adnan Aslam is passionate about helping everyday drivers understand their vehicles better. Through CarFixedExpert.com, he shares clear, step-by-step car maintenance guides written in simple language. His goal is to make basic repairs and maintenance easy, safe, and affordable for everyone.
He believes that even small car knowledge can save money and prevent major problems. His content focuses on practical advice, safety awareness, and beginner-friendly explanations.